Jedify Azure AD SSO setup guide
This guide will help you configure SAML SSO between your Azure Active Directory and our application using the SSO Setup Wizard.
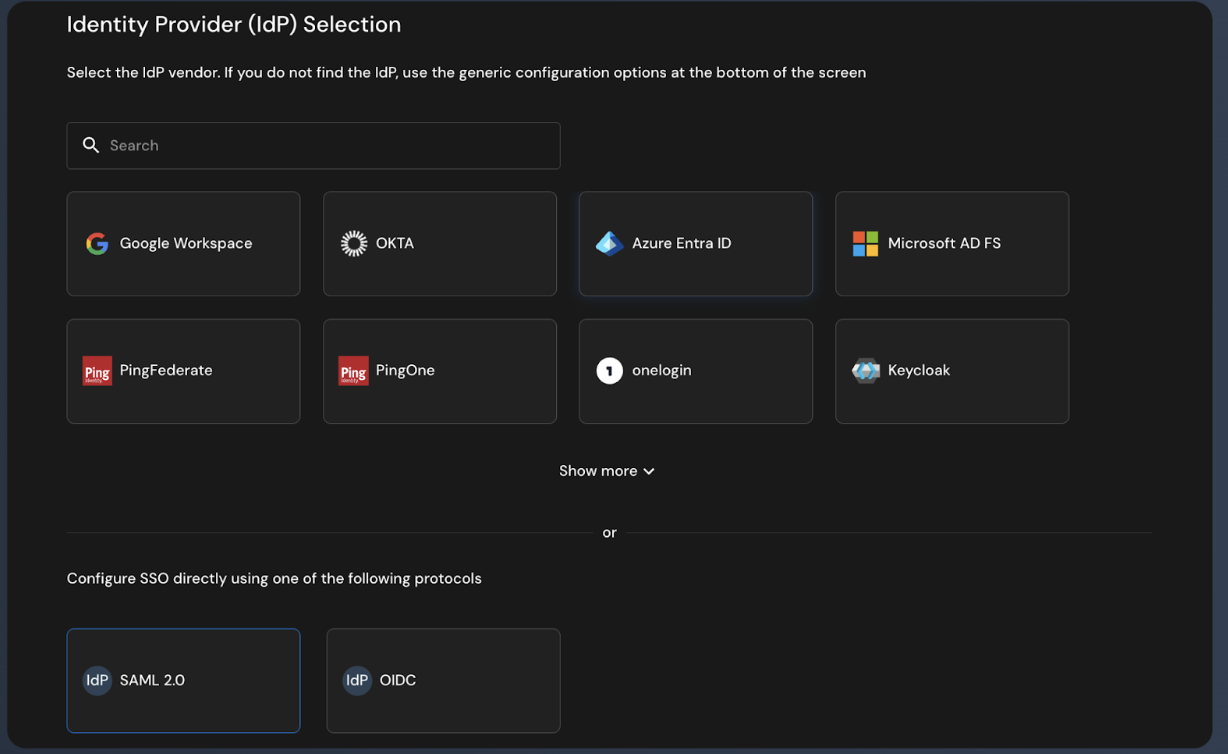
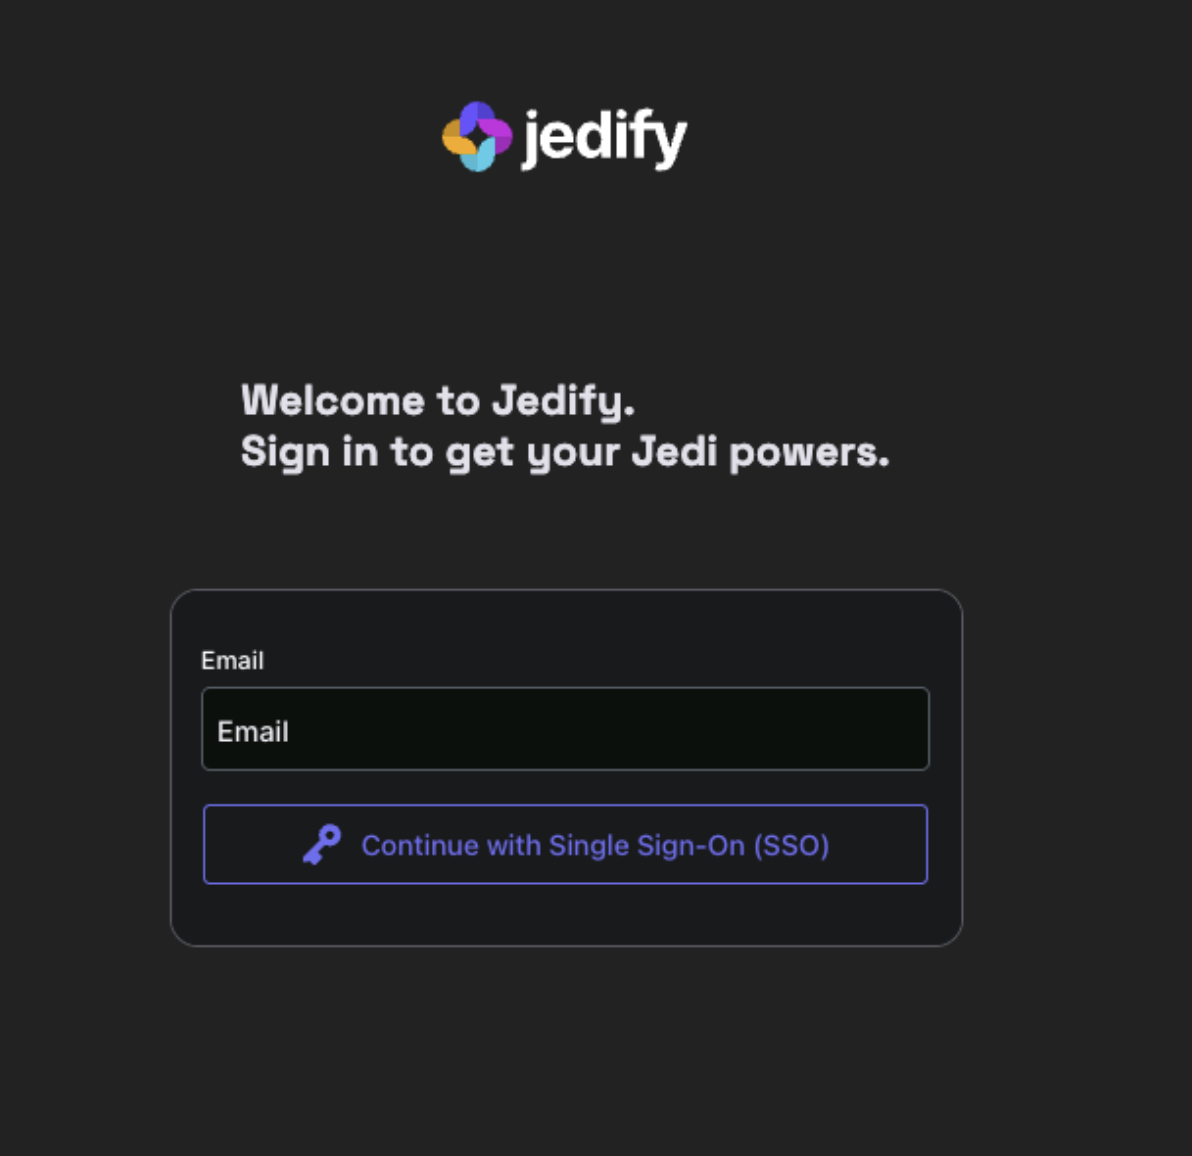
STEP 1: Start the SSO Setup Wizard
- Access the SSO Setup Wizard link provided by Jedify.
- On the Identity Provider (IdP) Selection screen, select "Azure Entra ID"
- Click Continue
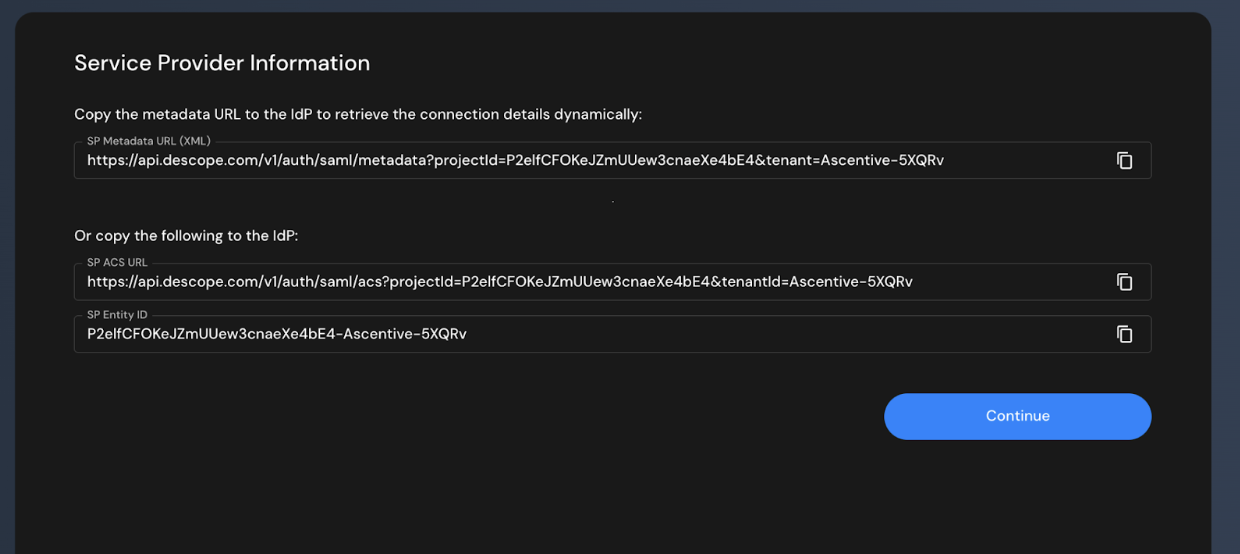
STEP 2: Copy Service Provider Information
The wizard displays three values you'll need for Azure configuration:
- SP Metadata URL (XML) - Optional, not needed for manual configuration
- SP ACS URL - Copy this URL (example:
https://api.descope.com/v1/auth/saml/acs?projectid=...) - SP Entity ID - Copy this value (example:
P2elfCFOKeJZmUUew3cnaeXe4bE4-Ascentive-5XQRv)
Keep this wizard page open - you'll return to it after configuring Azure.
STEP 3: Configure Azure AD
- Create Enterprise Application
- Open Azure Portal
- Navigate to Microsoft Entra ID (formerly Azure Active Directory)
- Click** Enterprise applications** in the left sidebar
- Click + New application
- Click + Create your own application
- Enter application name
- Select: "Integrate any other application you don't find in the gallery (Non-gallery)"
- Click Create
- Configure SAML Single Sign-On
- In your Enterprise Application, click Single sign-on in the left sidebar
- Click the SAML tile
- In Section 1: Basic SAML Configuration, click Edit
- Enter the values you copied from the wizard:
- Identifier (Entity ID): Paste the SP Entity ID from the wizard
- Reply URL (Assertion Consumer Service URL): Paste the SP ACS URL from the wizard
- Click Save
- Configure Groups Claim
- In Section 2:** Attributes & Claims**, click Edit
- Click + Add a group claim
- Configure:
- Which groups associated with the user should be returned in the claim? Select: "Groups assigned to the application"
- **Source attribute: **Select: **"Cloud-only group display names" **(sends readable names like "Admins" instead of UUIDs)
- Check:** "Customize the name of the group claim"**
- Name: Enter
groups - Namespace: Leave empty
- Click Save
- Copy Azure SAML Information
- You'll need three pieces of information from Azure to enter back into the wizard:
- In Section 4: Set up [Your Application], locate and copy:
- Login URL (example:
https://login.microsoftonline.com/[tenant-id]/saml2) - Azure AD Identifier (example:
https://sts.windows.net/[tenant-id]/)
- Login URL (example:
- In Section 3: SAML Certificates:
- Click Download next to Certificate (Base64)
- Open the downloaded
.cerfile in a text editor - Copy the entire certificate content (including
----BEGIN CERTIFICATE-----and----END CERTIFICATE-----) - Keep these three values ready - you'll paste them into the wizard next.
- Create Azure AD Security Groups (OPTIONAL)
- Go back to Microsoft Entra ID (use breadcrumb or search)
- Click Groups in the left sidebar
- Click + New group
- Configure:
- Group type: Security
- Group name: Enter a role name (e.g., "Admins", "Users", "Viewers")
- Members: Add users who should have this role
- Click Create
- Repeat for each role you need in your application
- Assign Users and Groups to Application
- Go to Enterprise applications → Your application
- Click Users and groups in the left sidebar
- Assign individual users:
- Click + Add user/group
- Click Users → Click None Selected
- Search for and select your users
- Click Select → Click Assign
- Assign groups:
- Click + Add user/group again
- Click Groups → Click None Selected
- Search for and select the security groups you created
- Click Select → Click Assign
STEP 4: Return to SSO Setup Wizard
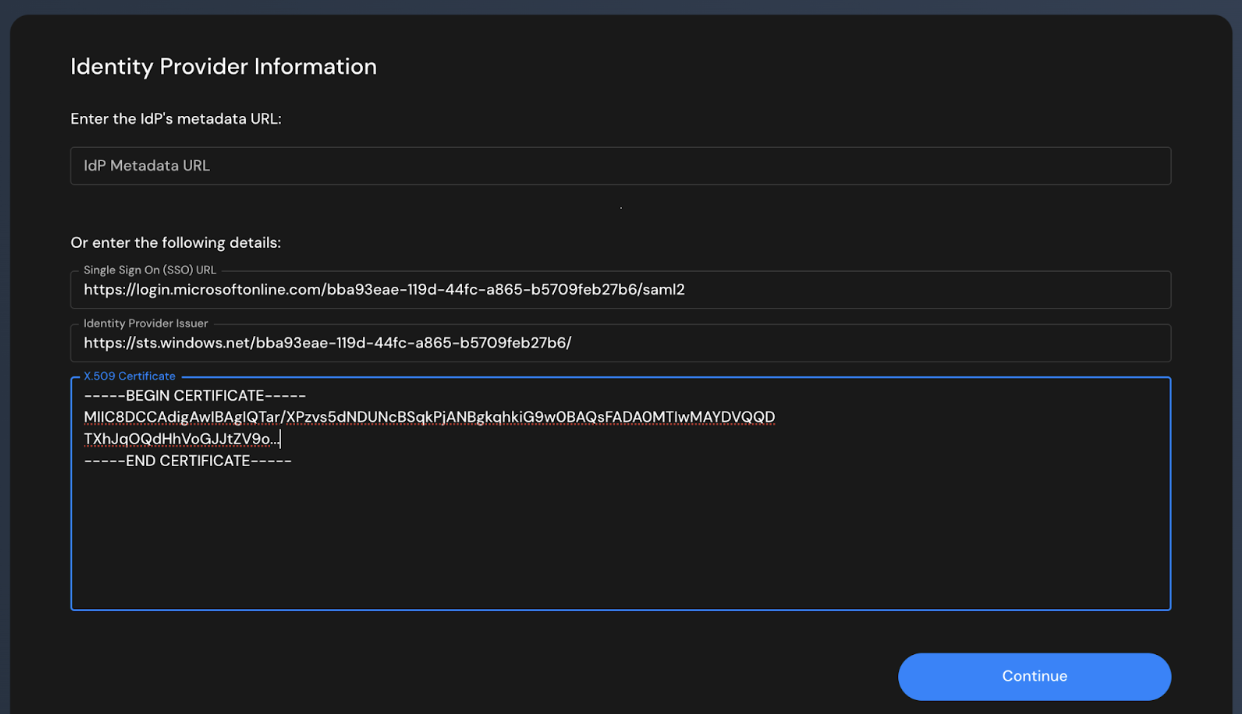
Go back to the wizard (should still be open) and click Continue to proceed to the Identity Provider Information screen.
Enter Azure SAML Details
- Skip the "IdP Metadata URL" field - leave it empty
- Enter the following details manually:
- Single Sign On (SSO) URL: Paste the Login URL from Azure
- Identity Provider Issuer: Paste the Azure AD Identifier from Azure
- X.509 Certificate: Paste the entire certificate content you copied from the downloaded file
- Click Continue
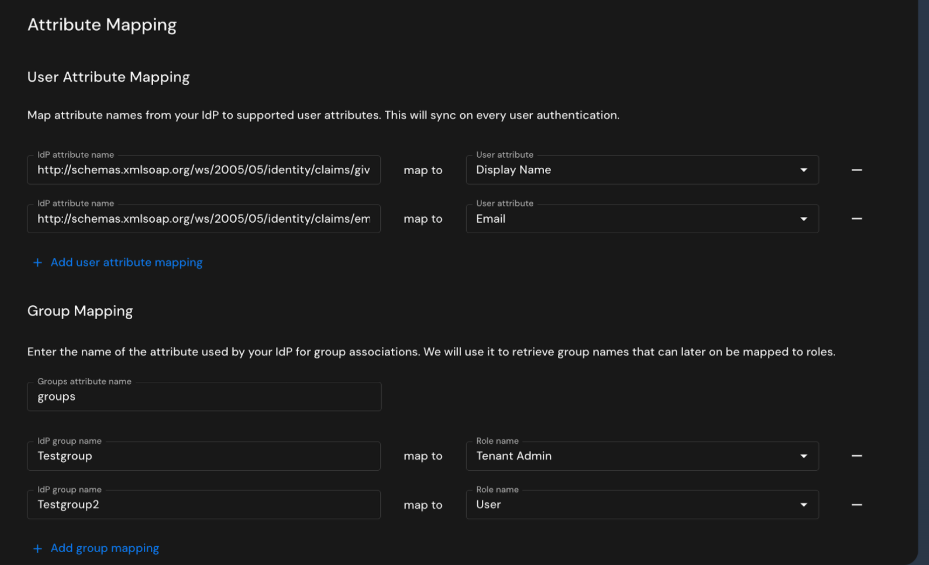
STEP 5: Configure Attribute Mapping
Map User Attributes
You should see default mappings. Verify or configure:
| IdP Attribute Name | User Attribute |
|---|---|
| http://schemas.xmlsoap.org/ws/2005/05/identity/claims/emailaddress | |
| http://schemas.xmlsoap.org/ws/2005/05/identity/claims/givenname | Given Name (or Display Name) |
| http://schemas.xmlsoap.org/ws/2005/05/identity/claims/surname | Family Name |
These are Azure AD's default SAML claim names - they may be different in your caase
Map Groups to Roles
- Groups attribute name: Verify it shows
groups(should be pre-filled) - Add group mappings: For each Azure AD group you created, map it to an application role:
| IdP Group Name | Role Name |
|---|---|
| Admins | Admin |
| Users | User |
| Viewers | Viewer |
- Use the exact group names from Azure (e.g., "Admins", "Users") - these are case-sensitive
- If you need additional mappings, click + Add group mapping
- Click Continue
STEP 6: Configure SSO Domains
- Enter your organization's email domains (e.g.,
yourcompany.com) - Users with emails from these domains will automatically be routed to Azure AD SSO
- Click Continue
STEP 7: Test the Configuration
- Click Test button
- You will be redirected to the Microsoft login page
- Sign in with an Azure AD account that:
- Is assigned to the application
- Is a member of at least one assigned group
- After successful authentication, you should be redirected back to the application
Verify the Configuration
After a successful test:
- Check that you can access the application
- Verify your user has the correct role(s) based on Azure AD group membership
- Try logging in with different users from different groups to verify role mapping
Updated 3 months ago