Claude Setup
This guide will help you set up Claude Desktop to connect with your organization's Jedify business intelligence platform.
Prerequisites
Before starting, ensure you have:
- Claude Desktop installed - Download Claude Desktop if not already installed
- Node.js v24.1.0 and NPM 11.3.0 installed - Download Node.js
- Jedify account access - Confirm you can access your organization's Jedify platform
Step 1: Locate Configuration File
You need to edit the Claude Desktop configuration file:
Through Claude Desktop
Go to settings > Developer > click Edit Config
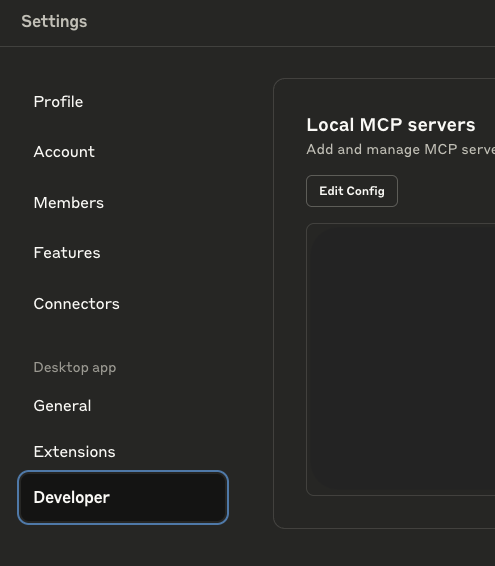
Claude Desktop Settings
Manually
macOS
~/Library/Application Support/Claude/claude_desktop_config.jsonWindows
%APPDATA%\Claude\claude_desktop_config.jsonIf the file doesn't exist, create it as an empty JSON file: {}
Step 2: Add Jedify Configuration
Add the following configuration to your claude_desktop_config.json file:
{
  "mcpServers": {
    "jedify": {
      "command": "npx",
      "args": ["@jedify/mcp-auth"],
      "env": {
        "REMOTE_MCP_URL": "https://api.jedify.com/mcp/sse",
        "DESCOPE_PROJECT_ID": "P2abc123def456gh789"
      }
    }
  }
}
Step 3: Restart Claude Desktop
After saving the configuration file:
- Close Claude Desktop completely
- Restart Claude Desktop
- Wait for Claude Desktop to load completely
Step 4: First Authentication
When you first interact with Jedify tools in Claude Desktop:
Initial Connection
Start a new conversation in Claude Desktop and try:
Help me understand what data is available in JedifyAuthentication Flow
The system will automatically:
- Detect that authentication is required
- Open your browser to your organization's login page
- Complete secure authentication
- Store authentication tokens
- Return to Claude Desktop ready to use
Browser Authentication Steps
- Browser Opens: Your default browser will open to your organization's login page
- Login: Use your organization credentials to log in
- Success: You'll see a "Success! You can close this tab" message
- Return to Claude: Switch back to Claude Desktop to continue
Verification
To verify your setup is working correctly:
Test Connection
Ask Claude: "What data entities are available in our Jedify platform?"
Expected Response
Claude should respond with information about your organization's data entities and semantic layer, confirming successful authentication and connection.
Configuration Details
| Parameter | Description | Value |
|---|---|---|
REMOTE_MCP_URL | Jedify MCP server endpoint | https://api.jedify.com/mcp/sse |
DESCOPE_PROJECT_ID | Authentication project identifier | P2abc123def456gh789 |
Security
- Encrypted Communication: All communications use secure HTTPS
- User Permissions: Access limited to your organization's data and your user permissions
- Automatic Token Management: Tokens refresh automatically and expire for security
Troubleshooting
Configuration file not found
Create the file manually at the correct location and ensure proper JSON formatting.
Authentication fails
- Check with your Jedify administrator about account access
- Try clearing browser cookies for the authentication domain
Connection issues
- Verify your internet connection
- Ensure Claude Desktop is fully restarted after configuration changes
Next Steps
Once you have successfully configured and authenticated:
- Explore Available Tools → - Learn about all available analysis capabilities
- See Common Use Cases → - Discover practical analysis workflows
- Get Help → - Common issues and solutions
Updated 9 days ago